Install a Linux SQL Server VM in Azure Step by Step Tutorial
To Create a Linux VM with SQL Server installed
Open the Azure portal.
Click New on the left.
In the New blade, click Compute.
Click See All next to the Featured Apps heading.
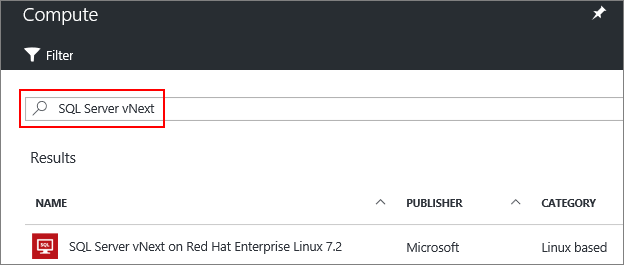
In the search box, type SQL Server vNext, and press Enter to start the search.
Select a SQL Server vNext image from the search results.
Click Create.
On the Basics blade, fill in the details for your Linux VM.
Click OK.
On the Size blade, choose a machine size. For development and functional testing, we recommend a VM size of DS2 or higher. For performance testing, use DS13 or higher.
Click Select.
On the Settings blade, you can make changes to the settings or keep the default settings.
Uninstall SQL Server on Red Hat Enterprise Linux Step by Step Tutorial
In order to remove the mssql-server package, follow these steps:
Run the remove command. This will delete the package and remove the files under /opt/mssql/. However, this command will not affect user-generated and system database files, which are located under /var/opt/mssql.
sudo yum remove mssql-server
Removing the package will not delete the generated database files. If you want to delete the database files use the following command:
Upgrade SQL Server on Red Hat Enterprise Linux Step by Step Totorial
In order to upgrade the mssql-server package, execute the following command:
sudo yum update mssql-server
These commands will download the newest package and replace the binaries located under /opt/mssql/. The user generated databases and system databases will not be affected by this operation.
After the package installation finishes, run the configuration script and follow the prompts. Make sure to specify a strong password for the SA account (Minimum length 8 characters, including uppercase and lowercase letters, base 10 digits and/or non-alphanumeric symbols).
sudo /opt/mssql/bin/sqlservr-setup
Once the configuration is done, verify that the service is running: