Thursday 5 November 2015

How to Install Zabbix on Red Hat Linux or Cent OS Step by Step


How to Install Zabbix on Red Hat Linux or Cent OS


Zabbix is the fastest growing monitoring tool today in market. Lot oc companies want to cut down the cost on monitoring and move to Opensource and Zabbix has emerged as the prefered choice.

Step 1: Installing repository configuration package


  • Install the repository configuration package. This package contains yum configuration files.


Command:

# rpm -ivh http://repo.zabbix.com/zabbix/2.4/rhel/6/x86_64/zabbix-release-2.4-1.el6.noarch.rpm


Step 2: Installing Zabbix packages

Install Zabbix packages. This example  install Zabbix server and web frontend with mysql database on same server

Command:

# yum install zabbix-server-mysql zabbix-web-mysql zabbix-agent

If you want to install agent only for monitoring follow the below steps

# yum install zabbix-agent


Step 3:Creating initial database

Create zabbix database and user on MySQL. Import initial schema and data.

Command:

# cd /usr/share/doc/zabbix-server-mysql-2.4.0/create
# mysql -uroot zabbix < schema.sql
# mysql -uroot zabbix < images.sql
# mysql -uroot zabbix < data.sql

Edit database configuration in zabbix_server.conf

# vi /etc/zabbix/zabbix_server.conf
DBHost=localhost
DBName=zabbix
DBUser=zabbix
DBPassword=zabbix

You can give any complex password you want.

Step 4:Start Zabbix server process:

# service zabbix-server start

Step 5:Editing PHP configuration for Zabbix frontend

Apache configuration file for Zabbix frontend is located in /etc/httpd/conf.d/zabbix.conf. Some PHP settings are already configured.

# vi /etc/httpd/conf.d/zabbix.conf

php_value max_execution_time 300
php_value memory_limit 128M
php_value post_max_size 16M
php_value upload_max_filesize 2M
php_value max_input_time 300
# php_value date.timezone Europe/Riga
It's necessary to uncomment the “date.timezone” setting and set the right timezone for your location.

After changing the configuration file restart the apache web server.

# service httpd restart

Step 6: Done Your server is ready


  • Zabbix frontend is available at http://ipddress/zabbix in the browser. 


Default username/password is Admin/zabbix.


Enjoy!


Thursday 8 October 2015

How to view the dependencies for a management pack

How to view the dependencies for a management pack


Many times you want to know what management pack are the current MP depend on,


To view the dependencies for a management pack

  • In the Operations console, in the Administration workspace, click Management Packs.
  • Right-click the desired management pack, and then click Properties.
  • In the Properties dialog box for the management pack, click the Dependencies tab.
  • The Dependencies tab lists any management packs that the selected management pack depends on and any management packs that depend on the selected management pack.

What does Sealed and Unsealed Management Packs mean

What does Sealed and Unsealed Management Packs mean


  • Management packs are either sealed or unsealed. A sealed management pack is a binary file that cannot be edited. An unsealed management pack is an XML file that can be edited. Sealed management packs should have an .mp extension, while unsealed management packs should have an .xml extension.

  • In general, management packs obtained from an application or hardware device vendor are sealed.
Although you cannot change the settings in a sealed management pack, you can still customize the applied settings of a management pack after it is imported by using overrides or by creating additional settings such as rules, monitors, and tasks that supersede the management pack's default settings. All customizations that you create are saved to a separate management pack file.

What is a Management Pack in SCOM mean

What is a Management Pack in SCOM mean

  • Generally when you explain to your top management about SCOM, you use the word Management pack. All of sudden on of the executive stopped and asked me what does Management Pack mean, So i taught it would be useful if i give some explanation here.
  • Management packs typically contain monitoring settings for applications and services. After a management pack is imported into a management group, System Center 2012 – Operations Manager immediately begins monitoring objects based on default configurations and thresholds that are set by the management pack.
Each management pack can contain any or all of the following parts:
  • Monitors, which direct an agent to track the state of various parts of a managed component.
  • Rules, which direct an agent to collect performance and discovery data, send alerts and events, and more.
  • Tasks, which define activities that can be executed by either the agent or the console.
  • Knowledge, which provides textual advice to help operators diagnose and fix problems.
  • Views, which offer customized user interfaces for monitoring and managing this component.
  • Reports, which define specialized ways to report on information about this managed component.
  • Object discoveries, which identify objects to be monitored.
  • Run As profiles, which allow you to run different rules, tasks, monitors, or discoveries under different accounts on different computers.

Tuesday 6 October 2015

Can IIS Managment Pack run on Low Privilege account

Can IIS Management Pack run on Low Privilege account


  • The IIS Management Pack relies on the IIS metabase, which requires administrator rights. Because of this requirement, the Management Pack cannot be run using a low-privilege account on an agent computer

Friday 18 September 2015

New Windows Server Operating System Management pack for Windows 2012 R2 version 6.0.7297.0

New Windows Server Operating System Management pack for Windows 2012 R2 Version 6.0.7297.0


  • Microsoft has released a new MP for Windows Server which include 2012,2012 R2, Windows 2008
Following are the Fixes that has been done in this latest

  • In 2008, 2012 platforms, the “Logical Disk Free Space (%) Low” monitor do not alert as expected when free space is 0%. With this fix, this monitor will alert when free space is 0%
  • In all platforms, logical disks are un-discovered if we configure them as Asymmetric storage on Failover Cluster. With this fix, this issue will be resolved
  • The Windows Server OS Management pack collects logical disk size is megabytes. During discovery this value used to be assigned to integer property. When logical disk size is significantly large (for example, when disk is of several petabytes), in megabytes format it goes out of boundaries of integer type. As a result the workflow fails while trying to insert discovery data. To support large logical disk another double properties was introduced, since double type has much more wide values range. Old integer property with constant “-1” value is preserved for upgrade compatibility and marked as DEPRECETED
  • “Volume Mount Points on Dynamic Disks” aren’t discovered by Microsoft Windows Server 2012 Discovery MP. With this fix, this issue will be resolved
  • MP has been modified to not discover System Reserved volumes on Windows Server 2012 to ensure it is consistent with the rest of the OS versions

To Download the Latest MP: Click Here

Wednesday 16 September 2015

How to Create Custom Event ID monitoring using SCOM 2012 R2 - Step by Step

How to Create Custom Event ID monitoring using SCOM


  • Many Times we get request to create new Event ID monitors which are not default available.Today we will create those Event  ID monitors to Monitor Custom Event ID.
  • First Install the System Center Operations Manager 2007 R2 Authoring Console.This is the Tool that will help you create Custom Monitoring and very effective tool for developing Managements pack
Step by Step:


  • Once you Install the Tool open it and click on the Icon Below and select New Management Pack and give a name


    • Then Click on "Health Model Tab" and right hand side click New-->Alerting-->Windows Event
    • This will Open the Windows Event ID Custom Monitoring Pane


    • Now give it a Name "Event ID 7040 Monitoring"


    • Then Click on Target and Select "Browse All Classes"
    • Now Check "List" and Search for "Windows Computers" and Select it
    • In Category select "Alerts" and Click Next
    • Now in The Log Name Give a Event Log where the event is logged. In our Case we Select "System". Then click Next


    • Now Enter the "Event ID" and "Event Source" and Click Next


    • Give the Alert the Name you want and click Finish


    • Now Save the MP in Top and Import it in your Environment to Monitor this Event ID


    Tuesday 1 September 2015

    PowerShell Command to get Specific Alert in SCOM 2012 R2 and SCOM 2016

    PowerShell Command to get Specific Alert in SCOM 2012 R2 and SCOM 2016


    • Powershell Command to get only Specific alert with Specific Name is something we are asked frequently
    • Use the Below Command to get it done
    • GET-SCOMAlert Where {$_.Name --eq "Alert You want to get"}

    Tuesday 25 August 2015

    Cool Dashboards in recent SQL 2012 MP

    Cool Dashboard in recent SQL 2012 MP


    • Microsoft has released a pretty cool dashboard in recent SQL 2012 MP.
    • It gives awesome dashbaord view for the team to Monitoring and know you database perforamnce from single console
    • To Download latest MP click here --> Download


    Thursday 6 August 2015

    SCOM 2012 R2 Powershell Command to check if Server is Physical or Virtual

    SCOM Powershell Command to check if Server is Physical or Virtual


    • Get-SCOMaccesLicense where DEVICE_ID "Computername"
    • This will give you information whether the server is Virtual or Physical.Its agent managed or Agentless Managed.

    Friday 31 July 2015

    New ALT TAB Button in Windows 10

    New ALT TAB Button in Windows 10


    • Earlier to Jump Between different Application we have to Minimize one and maximize one. 
    • Then we started using ALT+TAB button to switch between different Application windows
    • Now Microsoft has given a button next to Search Box in Windows 10
    • If you Click on it You can jump between various windows.
    • This has been done to make compaitable with Windows Tab (Surface) and Windows Phone

    New Search Box in Windows 10

    New Search Box in Windows 10


    • Earlier version of Windows You have to click on Start to Search.
    • But In Windows 10 this has been moved next to Start in Launch Bar itself
    • So you can SEARCH for Notepad and Word and it will show up

    Thursday 30 July 2015

    Where is All Programs in Windows 10. Its now called All Apps

    Where is All Prgrams in Windows 10. Its now called All Apps

    • Lot of Things have Changed in Windows 10.
    • One Such important thing that change is All Programs.
    • Earlier we use to Click Start-->All Programs to Find our Application.
    • But with Windows 10, this has been Changed to Start -->All Apps
    • This is Done so that its compatible with Windows Phone.
    • So hope you get used to it :)


    Tuesday 28 July 2015

    SCOM 2012 R2 Data warehouse command to get information on Various Tables and how much space they are talking

    SCOM 2012 R2 Data warehouse command to get information on Various Tables and how much space they are talking


    • SCOM Data warehouse is the one where we store all data for longtime.
    • Usually this will be in terabytes of data and will fill very fast if not confiureged properly
    • Most offten you can see that the Datawarehouse if Full or going to be full and you want to find out what is the configuration and which Table is taking the most data
    • Microsoft has pushed a command line tool in SCOM 2012 R2 called dwdatarp.exe
    •  To get the list of tables using more space and configuration use the below command

    dwdatarp.exe -s SQLServer\DatabaseName -d OperationsManagerDW > c:\dwoutput.txt


    • This will give you the output with Space used and the How many days of data is stored.

    Monday 27 July 2015

    Command to Get List of Patches installed on Windows 2008 R2 and Windows 2012

    Command to Get List of Patches installed on Windows 2008 R2 and Windows 2012


    • Manytime we get request from application owners who request for list of patches instaled and on what date
    • You can use the below command to get the list of Patches from the server. This will Create a html file called hotfix.html in your C: drive.
    • wmic qfe list brief /format:htable > "c:\hotfix.html"

    Thursday 16 July 2015

    Take Screenshot or Screen Captures in Windows 10 Made easy

    Take Screenshot or Screen Captures in Windows 10

    • Earlier we have to use the PrintScreen button to take screenshots.
    • This has been understood by microsoft that its a teadious task.
    • So they have included a new tool called "Snipping Tool"
    • Select the sniping tool by clicking on start and search for "Snipping tool" and click on it
    • This will open the snipping tool. Now click on new and select the area you want to take screenshot and save it. So easy.

    Saturday 4 July 2015

    Add new Disk on Virtual Servers in Windows Azure

    Extend Disk on Virtual Servers in Windows Azure


    • First Login to Windows Azure portal and your Virtual Mahcine and select "Attach an Empty Disk"
    • Now enter the Disk Size you want and click Create

    Create Virtual Network in your Azure - Step by Step

    Create Virtual Network in your Azure

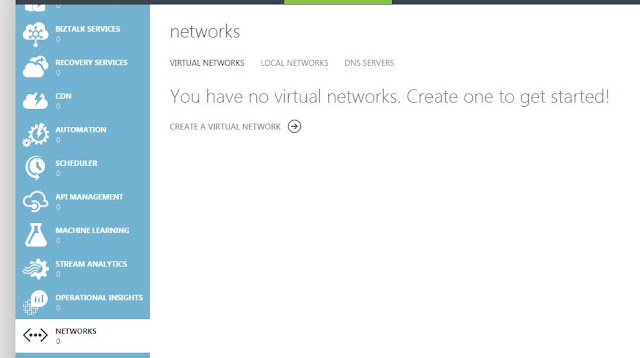
    • Before you Create your Virtual Server , you need to create your virtual network in your Azure platform. or else you cant assign static IP to your Server.
    • Login to your Azure portal and click on Networks
    • Click on "Create a Virtual Network"

    • Now enter your Virtual Network Name and enter the Location
    • Next  enter the DNS server Name and IP.

    • Select the Subnet and select the Range.

    • Click next and your Virtual Network is created.

    Step by Step instruction to Create a Windows 2012 R2 Server in Windows Azure

    Step by Step instruction to Create a Windows 2012 R2 Server in Windows Azure


    • Inorder to create a new Windows 2012 R2 server, login to your Azure portal and click on virtual machines Tab

    • Now Click on "Create A Virtual Machine"

    • Then Click Quick Create and select IMAGE which ever OS you want in this we will install "Windows Server 2012"  and Configuration you want. Also give the admin Name and password of your VM and which region  you want your VM to be in and click "Create Virutl Machine"
    • This will start building your VM and it will be ready in few Minutes.


    • One its ready Click on Connect in the Bottom and it will prompt you to open RDP file of server.Download the RDP file to your desktop

    • Now Double click the RDP file and Click Connect. Enter the Username and Password  and you will get the RDP of the server.

    Wednesday 1 July 2015

    How to Scope your Microsoft Operations Manager Suite Dasboard

    How to Scope your Microsoft Operations Manager Suite Dasboard


    • Dashoard is very useful place to see an overview of your enviornment.
    • Sometimes you want to see how the error are are for last 1 hour or last 4 hours.
    • For this can use the Scope feature in your Operations Manager Dashboard.
    • Click on "My Dashboard" in MOM Suite.
    • This will show data by defaukt for last 7 days.
    • On Right hand Side Click on Scope and Change the Date and time that you want.


    How to add new Solutions to your Microsoft Operations Manager Solutions Suite

    How to add new Solutions to your Microsoft Operations Manager Solutions Suite


    • To add new Solutions to your Microsoft Operations Manager Solutions,do the following.
    • Login to Your Microsoft Operations Manager Solutions
    • Now Click on Solution Gallery Tab
    • This will take you to Solutions Gallery where you see Different Solutions on Right Side.
    • Now Click on the Solution You want in This we click on "Security and Audit"

    • Now Click "Add" and your solution will be added to your dasboard.

    Install SCOM 2012 R2 agent on Servers Hosted in Microsoft Azure Cloud

    Install SCOM agent on Servers Hosted in Microsoft Azure Cloud


    • Microsot Azure is the Cloud Solution from Microsoft. You can Install SCOM agents and Monitor them using your Existing SCOM environment.
    • To Install SCOM agent on Windows Serve hosted in Microsoft Azure Cloud
    • Logon to Your Azure Portal
    • Then Click on Operation Insight Tab on the left


    • Then Click on the Workspace that you see 


    • Now You will be taken to the Dashboard Page,Now Click on SERVERS Tab


  • Now Click on "Enable OP INSIGHTS"

      • And Install SCOM agent on the Server. This will install SCOM agent on server automatically.


      • Now Login to Your Server and Go to Control Panel and Open Microsoft Monitoring Agent. YOu can see that the agent ins installed.If you have In house SCOM server then configure you Management server and your SCOM management group. in Operations Manager Tab. By Default it Connects to Microsoft Operaions Manager

      • You can see that after some time MP's get downloaded and Monitoring Start.

      Monday 29 June 2015

      Open Source Management Pack for SCOM 2016 to monitor Apache webserver and My SQL

      Open Source Management Pack for SCOM 2016:

      • Microsoft has release Opensource Management pack or OSS MP which allows to monitor Opensource technology using SCOM.
      • Now you can monitor Apache Webserver, MYSQL database using SCOM itself.
      • Infact the entire LAMB stack is not supported and caN be monitored using SCOM 2016.
      • You can Download the OSS MP from the below location
      • Click here

      Import Management Pack using Powershell SCOM 2012 R2

      Importing Management Pack using Powershell SCOM 2012 R2:


      • Inoder to Import the MP using Powershell use the below command
      Import-SCOMManagementPack -FullName "C:\Test.mp"

      • This will import the MP.

      Lync 2013 MP Install Step by Step SCOM 2012 R2

      Lync 2013 MP Install Step by Step:


      • Lync has taken over the entire communication channel.
      • Gone are the VOIP IP Cisco Phones which use to sit on your Desk.
      • Today everything is going to Mobile and Lync is the best and cheapest option from Micrososft.
      • So almost all enterprise have decided to migrate to Lync. So much is the Lync affects today that, we need a realtime monitoring more critical then outlook.
      • So Microsoft has worked on it very hard and have brought the realtime Monitoring using SCOM for Lync 2013.
      Microsoft Lync Server 2013 includes two SCOM management packs:

      • The Component and User Management Pack (Microsoft.LS.2013.Monitoring.ComponentAndUser.mp):
      • This MP Monitors Lync Server issues recorded in event logs, registered by performance counters, or logged in the call detail records (CDR) or the Quality of Experience (QoE) databases.

      Active Monitoring Pack (Microsoft.LS.2013.Monitoring.ActiveMonitoring.mp):

      • This MP proactively tests key Lync Server components such as logging on to the system, exchanging instant messages, or making calls to a phone located on the public switched telephone network (PSTN). These tests are conducted using the Lync Server synthetic transaction cmdlets. 

      Example:

      Test-CsIM: cmdlet is used to simulate an instant messaging conversation between a pair of test users. If this simulated messaging conversation fails an alert will be generated.

      Steps to Install MP:

      • Download the files Microsoft.LS.2013.Monitoring.ActiveMonitoring.mp and Microsoft.LS.2013.Monitoring.ComponentAndUser.mp.
      • In System Center Operations Manager, click Administration.In the Administration pane, right-click Management Packs, and then click Import Management Packs.
      • In the Select Management Packs dialog box, click Add, and then click Add from disk.
      • In the Online Catalog Connection dialog box, click Cancel to prevent Operations Manager from going online to see if any dependencies exist for the Lync Server management packs. If you are using System Center Operations Manager 2012, click No.
      • In the Select Management Packs to import dialog box, locate and select the files Microsoft.LS.2013.Monitoring.ActiveMonitoring.mp and Microsoft.LS.2013.Monitoring.ComponentAndUser.mp and then click Open. To select multiple files in the dialog box, click the first file, hold down the Ctrl key and then click the second file.
      • In the Select Management Packs dialog box, click Install. If you get an error message and installation fails, that typically means that the management pack files are in a folder protected by the Windows User Account Control. If this occurs, copy the files to a different folder and then restart the import and installation process.
      • In the Select Management Packs dialog box, click Close. Note that the import and installation process might require several minutes to complete.

      Sunday 21 June 2015

      Powershell Command to create Folder

      Command to create Folder from Powershell


      • Powershell is very powerful tool.You can create a Folder from within Powershell using "MD" command
      Below command creates a folder called test4 from within Powershell.

      md "c:\test4"

      Powershell Command to open any file

      Powershell Command to open any file


      • Many people think that you can only open txt or html file from Powershell. Thats not true.
      • You can open any File type using Invoke-Item Powershell Command

      In the below example we open JPG file from within powershell

      INVOKE-ITEM "C:\test.jpg"

      Powershell Script to get Event from Application Event Log

      Powershell Script to get particual Event from Application Event Log


      .You can use the below script to get Eventlog message using Powershell.

      $Server='Your Computer Name"
      $Yesterday="From Date in DD/MM/YYYY format"
      $Today="To Date in DD/MM/YYYY format"
      $Event = "Event ID you are looking for"
      Get-EventLog -ComputerName $Server -LogName "Application" -after $Yesterday -before $Today| where {$_.EventID -eq $Event}

      Wednesday 17 June 2015

      Audiocodes Management pack for Lync 2013

      Audiocodes Management pack for Lync 2013


      • Audio codes Management pack for Lync 2013 is SNMP based MP which is used to monitor the Audio codes devices.
      • Audio codes are the back end device which acts like a epbax box for lync.
      • Lync telephony is fast replacing the traditional cisco voip phones which we see in most organizations.
      • The cost saving benefit is huge and lot of organizations are migrating to it.
      • So it become vital to monitor these devices and Audicodes have replased a Management for all there devices be it M1K,M2K,M3K.
      • The Configuration of this MP is straight forward..First you discover it as netowrk device in SCOM. Then you install the MP and the devices will start getting monitored.
      • To download the MP go click here

      Wednesday 10 June 2015

      New features in Veeam V7 MP for SCOM 2012 R2

      New features in Veeam V7 MP for SCOM 2012 R2


      Support for Hyper-V:

      With Veeam MP v7, you can monitor health and performance of both Microsoft Hyper-V
      and VMware vSphere environments. Now Hyper-V administrators can get the same great
      monitoring, alerting, advanced reporting and unique dashboards that Veeam provides for
      vSphere.

      Heatmap Dashboard:


      Easy to access live data from any object in your Hyper-V or vSphere environment with incontext dashboards and drill-down capabilities. Veeam widgets work in tandem with dashboards to give you instant visualization of the metrics that matter most to you.

      Capacity planning for hybrid cloud:


      Veeam Management Pack takes the guesswork out of planning resources to run your virtual workloads in the cloud. Capacity planning for both Microsoft Azure and for VMware vCloud Hybrid Service first analyzes your on-premises virtual workloads and then provides recommendations for the required cloud IaaS resources.

      Tuesday 9 June 2015

      Powershell Command to extract sealed Management pack from SCOM 2012 R2

      Powershell Command to extract sealed Management pack from SCOM 2012 R2:


      • Many times we face situation where we want to export the sealed MP's
      • But guess what the MP was earlier imported by 1 of your collegue and he is no longer in the organization
      • Then you don't know where the MP's are and you can;t export sealed MP's in SCOM .
      • But there ise Command Shell (SCOM version of Powershell to help you)
      • Get-SCOMManagementpack "*veeam*" | Export-SCOMManagementpack -Path "c:\export" 
      • This command will get you the sealed Management pack in xml form which is the same.
      • This xml version will also help you customize the vendor provided MP.

      Saturday 6 June 2015

      Key Components of Veeam Management Pack.


      Veeam Management pack is the most widely used MP to monitor the VMware infrastructure in the organization. So today we will see the key componets of this Veeam Management pack
      Following are the Key components


      • Veeam VMware Collector — It collects event and performance data from VMware systems.
      • Veeam Virtualization Extensions Service — It is used for centralized configuration of Veeam like adding Host to monitor,disable jobs,remove host,adding licenses etc.
      • Veeam Virtualization Extensions UI — web UI for configuration of the Extensions Service and the managed Collectors.All Veeam relate config has t be done from this UI only. You calose use VEShell, which is Veeam powerhsell extension 
      • Veeam Management Packs — It contain all the rules,monitors and other dasbaord which when imported to SCOM will give you rich visbility of your VM infrastructure.

      Thursday 4 June 2015

      Delete SCOM management Packs using Powershell in SCOM 2012 R2

      Delete SCOM management Packs using Powershell


      • SCOM has a very powerful Command shell which is a subset of Powershell
      • Most of the time we have to delete lot of old management packs and when there are more than 20 to delete, you have to select 1 by 1 and delete.
      • But there is a easier way to do it with Command Shell
      • Use command "Get-SCOMmanagementpack | where{$_.displayname -like "*Windows*"}|Remove-SCOMManagementPack"
      • This will delete all the management pack which matches the word windows

      Thursday 28 May 2015

      SQL query to find out if your SCOM 2012 R2 Grooming jobs are succeeding

      SQL query to find out if your SCOM 2012 R2 Grooming jobs are succeeding:


      • Grooming jobs are very important in SCOM.
      • If grooming fails then your old data is not removed as per your grooming settings.
      • This will cause your database to fillup and also cause slowness.
      • You need to regularly monitor the Grooming jobs are will face a outage.
      • Unfortunately, SCOM only raise alert if the grooming fails for atleast 6 days.
      • So by this time depending on your environment there could be lot of issues  and grooming could never be completd
      • So i came up with SQL query which you can use to daily check after 6:00 AM server time
      • "SELECT * FROM INTERNAJOBHISTORY ORDER BY INTERALJOBHISTORYID DESC"
      • Run the above query and check if the grooming jobs succeeds. You should do this daily to avoid our OperationsManager Database gets filled.


      Monday 25 May 2015

      PowerShell Command to repair SCOM agent

      PowerShell Command to repair SCOM agent


      • There are many different ways to repair a SCOM agent.
      • Most preferred way is to Use SCOM console Right Click and select repair option.
      • Another way is to Use Command Shell command
      • "REPAIR-SCOMAGENT" is the command you have to use to repair the SCOM agent.
      • By default it uses the SCOM action account to repair the agent.So make sure it have sufficient rights on the server

      Thursday 21 May 2015

      Log File Monitoring in Azure using Microsoft Operations Manager Insight

      Log File Monitoring in Azure using Microsoft Operations Manager Insight


      • Log File Monitoring using  Microsoft Operations Manager Insight is bit tricky. You should have ths knowledge of developing the management pack. But we will help you.
      • Inorder to send the data to  Operational Insight, you need to reference "Microsoft.IntelligencePacks.Types" MP. You also need to reference "System.ApplicationLog.Library".
      The collection rules has 3 parts: 

      1)  A data source reading the log (In example its picking up every single line from it, matching wildcard “*” – but you can use this to filter what in each of your logs is ‘interesting’/worth collecting).

               <DataSource ID="LogDS" TypeID="AppLog!System.ApplicationLog.GenericLog.FilteredEventProvider"> 
                  <LogFileDirectory>c:\Logs\</LogFileDirectory> 
                  <LogFilePattern>Test*.log</LogFilePattern> 
                  <LogIsUTF8>false</LogIsUTF8> 
                  <Expression> 
                    <RegExExpression> 
                      <ValueExpression> 
                        <XPathQuery Type="String">Params/Param[1]</XPathQuery> 
                      </ValueExpression> 
                      <Operator>MatchesWildcard</Operator> 
                      <Pattern>*</Pattern> 
                    </RegExExpression> 
                  </Expression> 
                </DataSource> 

      2) A condition detection used to MAP fields to the ‘event’ shape that OpInsights Log Management expects, 

      <ConditionDetection ID="Mapper" TypeID="SystemLibrary7585010!System.Event.GenericDataMapper"> 
                  <EventOriginId>$Target/Id$</EventOriginId> 
                  <PublisherId>$MPElement$</PublisherId> 
                  <PublisherName>GenericLog</PublisherName> 
                  <Channel>$Data/EventData/DataItem/LogFileName$</Channel> 
                  <LoggingComputer>$Target/Property[Type='MicrosoftWindowsLibrary7585010! Microsoft.Windows.Computer']/PrincipalName$</LoggingComputer>
                  <EventNumber>0</EventNumber> 
                  <EventCategory>3</EventCategory> 
                  <EventLevel>0</EventLevel> 
                  <UserName></UserName> 
                  <Description>$Data/EventData/DataItem/Params/Param[1]$</Description> 
                  <Params /> 
              </ConditionDetection> 

      3)A write action to send this data to the cloud:


         <WriteAction ID="HttpWA" TypeID="IPTypes!Microsoft.SystemCenter.CollectCloudGenericEvent" /> 


      Complete Rule Code:

            <Rule ID="MomUIGeneratedRuledc3f1e40e7d54c5a82e408523d686031" Enabled="true" Target="MicrosoftWindowsLibrary7585010!Microsoft.Windows.Computer" ConfirmDelivery="false" Remotable="true" Priority="Normal" DiscardLevel="100"> 
              <Category>EventCollection</Category> 
              <DataSources> 
                <DataSource ID="LogDS" TypeID="AppLog!System.ApplicationLog.GenericLog.FilteredEventProvider"> 
                  <LogFileDirectory>c:\Logs\</LogFileDirectory> 
                  <LogFilePattern>Test*.log</LogFilePattern> 
                  <LogIsUTF8>false</LogIsUTF8> 
                  <Expression> 
                    <RegExExpression> 
                      <ValueExpression> 
                        <XPathQuery Type="String">Params/Param[1]</XPathQuery> 
                      </ValueExpression> 
                      <Operator>MatchesWildcard</Operator> 
                      <Pattern>*</Pattern> 
                    </RegExExpression> 
                  </Expression> 
                </DataSource> 
              </DataSources> 
             <ConditionDetection ID="Mapper" TypeID="SystemLibrary7585010!System.Event.GenericDataMapper"> 
                  <EventOriginId>$Target/Id$</EventOriginId> 
                  <PublisherId>$MPElement$</PublisherId> 
                  <PublisherName>GenericLog</PublisherName> 
                  <Channel>$Data/EventData/DataItem/LogFileName$</Channel> 
                  <LoggingComputer>$Target/Property[Type='MicrosoftWindowsLibrary7585010!Microsoft.Windows.Computer']/PrincipalName$</LoggingComputer>
                  <EventNumber>0</EventNumber> 
                  <EventCategory>3</EventCategory> 
                  <EventLevel>0</EventLevel> 
                  <UserName></UserName> 
                  <Description>$Data/EventData/DataItem/Params/Param[1]$</Description> 
                  <Params /> 
              </ConditionDetection> 
              <WriteActions> 
               <WriteAction ID="HttpWA" TypeID="IPTypes!Microsoft.SystemCenter.CollectCloudGenericEvent" /> 
              </WriteActions> 
            </Rule>

      Tuesday 19 May 2015

      What is a Management Pack an What does it contain

      What is a Management Pack an What does it contain


      Management packs contain monitoring settings for applications and services. Once you import the management pack in SCOM 2012 R2 management group, it immediately begins monitoring objects based on configurations and thresholds that are set by the management pack.

      Each management pack can contain any or all of the following:

      • Monitors:It tells an agent to track the state of various parts of a managed component.
      • Rules: It tells an agent to collect performance and discovery data, send alerts and events etc.
      • Tasks: The activities that can be executed by either the agent or the console.
      • Views: It offer customized user interfaces for monitoring and managing this component.
      • Reports: It define specialized ways to report on information about this managed component.
      • Object discoveries: which identify objects to be monitored.
      • Knowledge Base: It provides Knowledge to help operators diagnose and fix problems.

      Monday 18 May 2015

      How to Activate Volume License pack for Office 2013

      How to Activate Volume License for Office 2013


      • Volume license editions of Office 2013 client products require activation.
      • You need to install this Pack whenever you want to setup KMS or configure a domain for Active Directory-Based activation.
      • All volume editions of Office 2013 client products are pre-installed with a Generic Volume License Key (GVLK) key, which supports automatic activation for both KMS and Active Directory-Based Activation, so you will not need to install a product key.
      • When an Office 2013 volume edition client is installed, it will automatically attempt to activate via either Active Directory by using its existing domain pairing or a DNS-discoverable KMS host on your organization network.
      • To set up Active Directory-Based activation, you must be running Windows Server 2012, Windows 8, or newer.
      • This download contains an executable file that will extract and install KMS host license files. These license files are required for the KMS host service to recognize Office 2013 KMS host keys.
      • Click here to Download

      Thursday 14 May 2015

      Squared UP Web Dashboard for SCOM 2012R2

      Squared UP Web Dashboard for SCOM 2012 R2


      • Dashboard is one of the places where SCOM failed very badly.
      • We where not able to answer the management when they want to se the data.
      • As SCOM web-console is very bad and we cant ask the management to open a dashboard from scom console.
      • We use to manage them by sending reports monthly,but the current management wants it to see it in live.
      • So recently we saw where reviewing some 3 rd party dasboards and we where very impressed by the "Squared UP" Dashboard.
      • Its a Pure HTML5 dashboard which directly connects to SCOM and shows the data.
      • Its so cool that everybody loved it and evn Microsoft got impressed and gave them time in the Microsoft Ignite meeting to demo the product.
      • You can see the below by going to http://demo.squredup.com
      • This dashboard is even compatible on your mobile which is cool.
      • You can also get 30 days free trial aand use the product and see how it looks.
      • Go to http://squaredup.com/ for more details

      Wednesday 13 May 2015

      Upgrade SCOM 2012 R2 agent using SCCM for latest UR upgrade


      Upgrade SCOM 2012 R2 agent using SCCM for latest UR upgrade


      • Follow the below command to upgrade SCOM agents using SCCM


      msiexec /i path\Directory\MOMAgent.msi /qn /l*v %temp%\MOMAgentUpgrade.log
      
      
      • This will upgrade the agent using the latest UR4 or UR5 upgrade

      Tuesday 12 May 2015

      Install SCOM 2012 R2 agent using SCCM or command line

      Install SCOM 2012 R2 agent using SCCM:

      Inorder to install SCOM agent using SCCM, we have to follow the belwo procedure. Please use the below command line script which you use to install the SCOM agent from command line or SCCM


      %WinDir%\System32\msiexec.exe /i path\Directory\MOMAgent.msi /qn USE_SETTINGS_FROM_AD={0|1} USE_MANUALLY_SPECIFIED_SETTINGS={0|1} MANAGEMENT_GROUP=MGname MANAGEMENT_SERVER_DNS=MSname MANAGEMENT_SERVER_AD_NAME =MSname SECURE_PORT=PortNumber ACTIONS_USE_COMPUTER_ACCOUNT={0|1} ACTIONSUSER=UserName ACTIONSDOMAIN=DomainName ACTIONSPASSWORD=Password AcceptEndUserLicenseAgreement=1

      USE_SETTINGS_FROM_AD={0|1}:

      Indicates whether the management group settings properties will be set on the command line. Use 0 if you want to set the properties at the command line. Use 1 to use the management group settings from Active Directory.

      USE_MANUALLY_SPECIFIED_SETTINGS=={0|1}:

      If USE_SETTINGS_FROM_AD=1, then USE_MANUALLY_SPECIFIED_SETTINGS must equal 0.

      MANAGEMENT_GROUP=MGname:

      Specifies the management group that will manage the computer.


      MANAGEMENT_SERVER_DNS=MSname:


      Specifies the fully qualified domain name for the management server. To use a gateway server, enter the gateway server FQDN as MANAGEMENT_SERVER_DNS.


      MANAGEMENT_SERVER_AD_NAME=ADname:

      Use this parameter if the computer's DNS and Active Directory names differ to set to the fully qualified Active Directory Domain Services name.


      SECURE_PORT=PortNumber:
      5723

      ACTIONS_USE_COMPUTER_ACCOUNT={0|1}:

      Indicates whether to use a specified user account (0) or the Local System account (1).

      ACTIONSUSER=UserName:

      Sets the Agent Action account to UserName. This parameter is required if you specified ACTIONS_USE_COMPUTER_ACCOUNT=0.

      ACTIONSDOMAIN= DomainName:

      Sets the domain for the Agent Action account identified with the ACTIONSUSER parameter.

      ACTIONSPASSWORD= Password:

      The password for the user identified with the ACTIONSUSER parameter.

      AcceptEndUserLicenseAgreement=1:

      Used to specify that you accept the End User License Agreement (EULA).


      Sunday 10 May 2015

      New Features added in SCOM 2016

      New Features added in SCOM 2016


      • SCOM 2016 is the next version of SCOM after SCOM 2012.
      • There architecture remains the same, but the support for dasboard has been improved vastly.
      • If you have see the SQL mp then you could see cool charts being displayed.
      • The same has been extended to all the MP's and given as a template which you can extend it to your MP as well.
      • The support for Azure is also improved,earlier you have connect through certificates to establish connection, but now you connect through Azure AD,so you just have to enter the username and password and it will connect you to the Azure platform from scom.This is a huge welcome move.
      • Also it will support Windows 2016,and SQL 2014.

      Thursday 7 May 2015

      DFS File System Management pack for Windows 2012 R2/2008/2003 - Step by Step Install

      DFS File System Management pack for Windows 2012 R2/2008/2003


      • File system is one of the biggest thing in any company.
      • And Monitoring Distributed File System is one great Challenge.
      • Microsoft has given a Management pack to Monitor the File system on Windows 20012 R2,2008 R2 and 2003.
      • You can download the MP from here-->Click here
      • The File Services management pack retrieves events and other health information generated by the services that make up the File Services role. Some of the role service management packs included in the File Services Management Pack also track important operational parameters such as the use of the Distributed File System (DFS) Replication staging area and the number of replication conflicts generated.
        In addition to the overall File Services role, this management pack monitors the following role services:
        • DFS Namespaces
        • DFS Replication
        • File Server (the Server service for SMB file sharing)
        • File Server Resource Manager (the service used for File Server Resource Manager and File Classification Infrastructure)
        • Services for Network File System 
      • Following are the supported OS
      • Monitored Computer
        Support
        Windows Server 2012
        Supported
        Windows Server 2008 R2
        Supported
        Windows Server 2008
        Supported
        Windows Server 2003
        Supported
        Windows 8
        Supported
      • Importing the MP is straight forward.Just Download all the MP's from above link.
      • Open SCOM console go to Administration --> Management Pack--> Right Click and select Import Managemet Pack.
      • Select from Disk Option and the select all the MP's that are Downloaded.
      • Please note that you have to remove older vesriosn of DFSS Replication management packs prior to installing the NEW DFS Replication management pack.

      Wednesday 6 May 2015

      SCOM 2016 Preview Version released

      SCOM 2016 Preview Version released


      • Next version of SCOM is released and its called SCOM 2016.
      • This was announced in the recent Microsoft Ignite Program.
      • To Download go to the below Link
      • Click here to Download

      Sunday 26 April 2015

      Step by step Document for integrating Oracle Enterprise Manager with SCOM


      Step by step Document for integrating Oracle Enterprise Manager with SCOM


      Oracle MP for SCOM 2012 R2

      Oracle MP for SCOM 2012 R2:


      • Oracle is one of the Widely used databases in the world. They are proven for there robustness in transaction databases and can easily scale through Peta bytes of data for Datawharehousing.
      • SCOM is the enterprise monitoring tool used to monitor the Infrastructure and leads the Gartner Monitoring Quadrant for many years.
      • Oracle has released a free Connector which you can download and install and intergrate with SCOM.
      • Features Include: 
         
        -
        Bi-directional exchange of alerts between Microsoft SCOM and Enterprise Manager
        -
        Automatic synchronization of alert state in Microsoft SCOM with the state of alert in Oracle Enterprise Manager (and vice-versa)
        -
        Webservices based communication
        -
        Out-of-box mapping of Oracle Enterprise Manger alert severity to SCOM alert severity
        -
        Ability to customize severity mapping between Enterprise Manager alert and SCOM event
      • You can see live demo on how it works by clicking here --> click here
      • You can download the connector here --> Click here